The first distraction I ran into a few months back was a cat peeing outside the litterbox, we're talking multiple times a day. It was horrible. I have two 11 year old cats, both rescues, and it didn't take long for us to figure out that one of them (the female oddly enough) stands up to pee, which means that any standard litterbox she's gonna pee over the side. I don't know why she stands up to pee. She ruined a couple of automatic litterboxes by peeing on the motor before we figured out what was going on and switched to a top entry litterbox. That worked pretty well with only a few accidents for several years, but then she developed an affinity for peeing on bath mats. After a few years in a mat free house she branched out to rugs, the floor under the rocking chair, piles of clean laundry, and most of all the laundry room floor There were times when I was mopping the laundry room floor three times a day!
I tried a variety of different cat litters, keeping everything off the floor, even removing the mat under their food, and nothing worked! Then I read an article that said that as cats age the top entry litterboxes can get harder for them to use. Jumping out of the litter causes wear on their hips. So I started looking for another litterbox.
I needed something with high sides for my cat who pees standing up, but it couldn't have gaps or open seams where the hood and litterbox joined. I searched EVERYWHERE without finding anything that would work for a high peeing cat, and then a friend pointed me to www.catinfo.org, a website run by a veterinarian that covers a variety of cat related topics. She had posted a litterbox design for a box that you could make yourself. It wasn't specifically for a cat that pees standing up, but I found that with a couple of adjustments and a higher cut door it would work pretty well. And best of all, I made it from a storage bin that I got from Target for $8.99, a far cry from the $40 that I'd spent on my previous litterbox.
So, if you're in the market for a litterbox, here's what you need to know!
Litterbox design
I got the idea for this litterbox from www.catinfo.org which has a lot of fabulous information on cats, but I modified Dr. Pierson’s design a bit to fit my high peeing cat’s needs.
What you need

- 30 gallon or similar size storage bin, you don’t need the lid – The one I got was this Sterilite tote for $8.99 at Target : http://www.target.com/p/sterilite-grey-stackable-plastic-tote-with-lid-30-gal/-/A-13796226#prodSlot=medium_1_60&term=Sterilite
- Yard stick or tape measure
- Something to cut with – The website (www.catinfo.org) suggests a utility knife, but I didn’t have one, so I used a saw for the main cuts, and some heavy duty kitchen shears to clean up the edges.
- Sandpaper – to smooth out the edges, you don’t want your cat getting scratched or caught on the sides
Measure several times (and hopefully you’ll only cut once)
1. On the long side of the box measure up from the bottom 8-10 inches and make a mark. Dr. Pierson suggests 8 inches, but I found my cat peed right over that, so I’m going with 10 inches. The door can be adjusted up/down a little with this litterbox design.
2. Measure the width of your widest cat, that’s the width I used for the bottom of my door (about 6 inches for my cats). Again, Dr. Pierson suggests 8 inches, but I’m trying to make the bottom of the door as narrow as possible so that my cat won’t pee out the door, but I still want it to be comfortable for my cats.
3. At you’re 8-10 inch height mark, make a horizontal line the width you want for the bottom of the door (the width of your cat). You want this line centered on the long side of the storage bin.
4. Centered on the top of the box measure out the width for the top of the door. This needs to be at least two inches wider than the bottom of the door to make the door height adjustable. You want to allow plenty of whisker room for your cats going in and out of the box. I went with an eight inch top to go with my 6 inch bottom, but if you have bigger cats you could go with 10-12 inches easily.
5. Draw a straight line down from the ends of the top of the door to the ends of the bottom of the door. These should be angled in an open V shape.
Here you can see from my rough cuts what you’re trying to do.

6. Cut down the sides, be sure you’re cutting at an angle along your line, and then across the bottom. I used a saw for the down cuts, and kitchen shears across the bottom.
7. Use kitchen shears to snip off any big jagged edges, and sandpaper to smooth them out even more.Adding the adjustable height door
You could just leave it like this, but I like to use the insert I’ve cut out to give the bottom of the door a rolled edge. It makes things smoother for my kitty’s belly if it drags on the edge. Using the insert also allows you some adjustment of the door height in case you don’t get the perfect height.
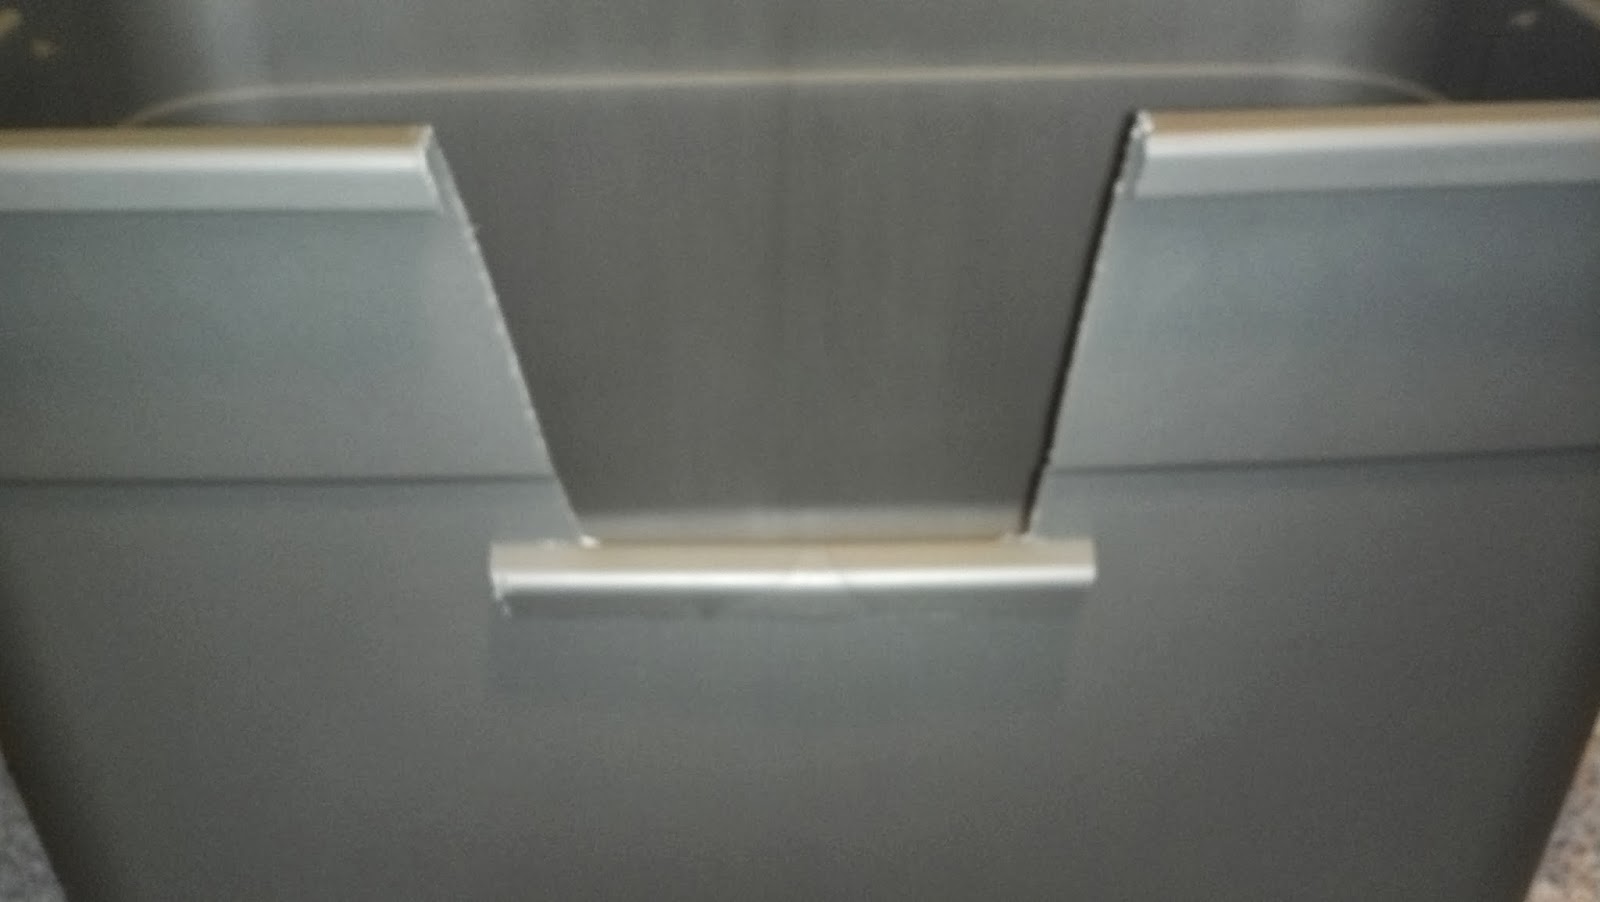
1. Position the piece you cut out from the door so that you’re looking at it top down, and the edge that rolls out from the top of the box is toward you. On the side away from you at the very top (this will be at the corner where the side meets the top, make slits 1-1.5 inches in on each side.
(see picture)

2. Slide your insert over your door so that the wall of the insert is inside the litterbox (this will insure that if the cat pees and hits the insert it is channeled into the litterbox) and the rolled edge covers the cut edge at the bottom of the door. The inside of the insert should lie flush with the inside of the litterbox.
The drawback of using the storage container that I used is that it has a ridge running around the side several inches down. I have to keep the insert below that ridge in order for it to lie flush with the side of the litterbox, but I can use the insert to adjust my door height up to the ridge and down as far as I cut.
Here you can see my old litterbox (approx $40) and my new litterbox (approx $9) side by side.
